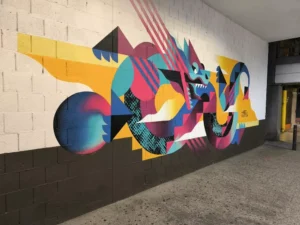
Brick walls can look amazing — if you design for the texture
Brick printing is not about tiny detail. It’s about big impact with a disciplined workflow.
CTA: Send a close-up brick photo. We’ll tell you what design style and workflow will work. If you’re comparing machine options, start here: wall printer.
Keywords covered
- print on brick wall / mural printing on brick
- brick wall printing machine / UV wall printer brick
- wall printer for brick walls / textured wall printing
Can you print on brick walls? (the honest answer)
Yes, you can print on brick walls with a wall printer for brick walls — but brick is not the same as smooth drywall. Brick texture sets a ceiling on fine detail. The best brick wall prints embrace bold graphics rather than trying to force photo-grade detail on a rough surface.
If your goal is “perfect tiny text,” brick is usually the wrong wall. If your goal is “big impact,” brick can look amazing.
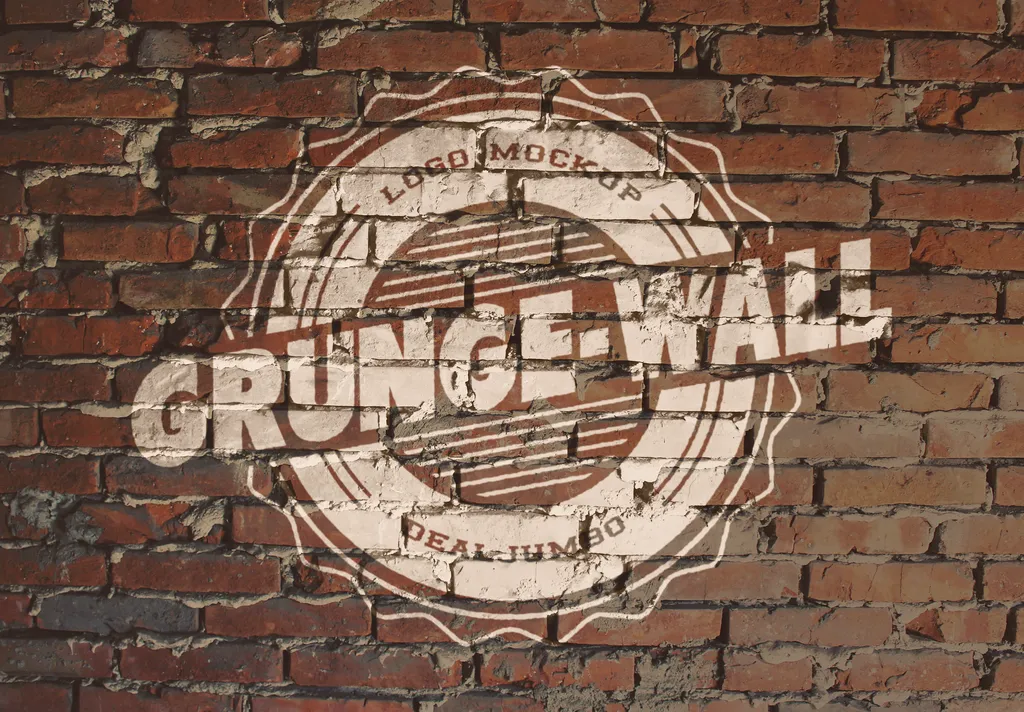
What brick texture does to detail and edges
Brick walls have:
- raised surfaces and grooves
- inconsistent texture across sections
- sometimes dust or powder in the grooves
This affects:
- edge sharpness (edges may soften)
- gradients (can look uneven if the surface changes)
- tiny text (can become unreadable)
A professional approach is to design for the wall, not against it. If you run a daily wall printing machine service, this is also how you protect repeatability and ROI.
Design rules that look good on brick
Use these rules to get premium results:
Go bigger
Make text large, shapes bold, and contrast strong.
Avoid micro-details
Fine lines and tiny fonts can “break” across brick grooves.
Use high contrast
Dark + light combinations read better on texture.
Consider a “stencil style”
Stencil-style art, bold icons, and simple compositions often look best.
If a client insists on a photo mural, run a test patch early and show them the result before you commit.
Workflow checklist (cleaning, distance, test patch)
Brick is where workflow discipline becomes everything.
Step A: Clean the brick
Dust in grooves is a major adhesion risk. Clean thoroughly.
Step B: Confirm wall stability
Loose powder, peeling paint, or moisture are red flags.
Step C: Control distance
Distance changes faster on brick texture. Ensure consistent distance and avoid head strikes.
Step D: Test patch
Include small text, a gradient, and a solid block so you can judge edge softness and banding. Test patch is your fastest way to reduce disputes and rework.

Common mistakes on brick and how to avoid them
Treating brick like drywall
Fix: redesign to bold shapes and larger text.
Skipping cleaning
Fix: clean grooves and do a test patch.
Printing too fast
Fix: slow down for better consistency when needed.
Not setting expectations
Fix: show close-up samples and explain how texture impacts detail.
Pricing and quoting tips for brick wall projects
Brick jobs can take more time:
- cleaning and prep
- test patch and adjustments
- slower settings for stability
So it’s reasonable to include:
- a surface complexity add-on
- a strict test patch approval step
- optional sealing/prep service
If you’re evaluating machines for textured walls, see: /wall-printing-machine/
Wall Printer quote checklist Send These 7 Items
- Country + city
- Typical wall height range
- Typical job size
- Main wall surfaces
- Indoor only or indoor + outdoor
- Dark walls needed?
- Power standard
CTA: Send a close-up brick photo → design recommendations + workflow + quote.
Get a quote