Dark walls need a different workflow
If you want bright colors on a black wall, you need the right white ink workflow — not just “more ink.”
Comparing a wall printer configuration for dark walls? Send a close-up wall photo + wall color and we’ll recommend the right approach.
Why dark walls are hard
Printing on a white wall is forgiving. Printing on a black or deep-color wall is not. That’s because most inks are not opaque enough to fully block a dark background in a single pass. Without the right workflow, your results can look:
- dull or muddy
- washed out
- inconsistent across wall patches
That’s why searches like white ink wall printer and UV white ink printing are so common: buyers want bright, consistent colors on dark walls.
What white ink does (and what it doesn’t)
What it does
Creates an opaque base layer that blocks the wall color.
Helps brand colors stay bright and consistent.
Enables some premium effects (layering for 2.5D textures in certain workflows).
What it doesn’t do
It cannot “fix” a dirty or chalky wall by itself.
It won’t make tiny text sharp on heavy texture.
It doesn’t eliminate the need for a test patch.
White ink workflows: underbase vs spot white
There are two common ways white ink is used in wall printing. A good wall printer machine supplier should help you choose the right strategy per job.

Workflow A: Full underbase (white under CMYK)
You print a white layer under the entire design, then print CMYK on top.
Best for:
- logos and posters on black walls
- full-color designs where brightness matters
Trade-off: more time and tighter QC requirements.
Workflow B: Spot white (white only where needed)
You print white only under selected areas (logos, highlights, text), then print color.
Best for:
- designs with limited bright elements
- faster production and lower ink use
Test patch checklist for dark walls
Dark walls are where the test patch becomes mandatory. Your goal is to confirm opacity, color accuracy, and adhesion before committing the full wall.
A good dark-wall test patch should include
- white text and fine edges
- a gradient
- a saturated brand color block
- a small photo detail area (if you print photos)
What you check
- opacity of white base
- color brightness and accuracy
- banding risk
- edge sharpness
- adhesion stability

Common problems and how to avoid them
Colors look dull
Cause: not enough white base or wrong settings.
Fix: adjust underbase density, do a patch, slow down if needed.
White looks uneven
Cause: wall surface variations or workflow inconsistency.
Fix: clean and seal chalky walls, tighten leveling and distance control.
Edges look soft
Cause: wall texture and inconsistent distance.
Fix: choose bold designs; avoid tiny text on rough walls.
Adhesion is weak
Cause: dust, moisture, or unstable paint layers.
Fix: prep and test patch, consider primer/sealer.
How to quote dark wall jobs (pricing add-ons)
Dark walls are not “same price as white walls.” Your quoting should reflect:
- extra time for underbase workflow
- additional test patch value
- more QC responsibility
Publish-safe formula
Total = minimum charge + (area × unit price) + dark wall workflow add-on + other add-ons
Add-ons protect margin and prevent “surprise work” from destroying profit. This improves long-term ROI.
Wall Printer Cost: Full Price Breakdown, ROI & How to Choose the Right Machine
How much does a wall printer cost? See real price ranges, what affects cost, ROI, and how to choose the right wall printing machine.

Is A Wall Printing Business Profitable?
Is wall printing business profitable? Learn real costs, pricing, profit margins, and how to get clients. A practical guide for starting and scaling.
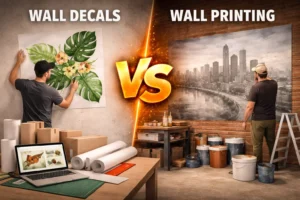
Wall Decals vs Wall Printing: How to Print Wall Graphics & Start a Wall Printer Business
Compare wall decals and direct wall printing. Learn how to print wall graphics, choose the right method, and start a profitable wall printer business.